How to Take a Professional Headshot at Home
Take a professional headshot with your phone: window light, a free AI background swap — cropped to LinkedIn or CV size in about a minute.
 BackGone Team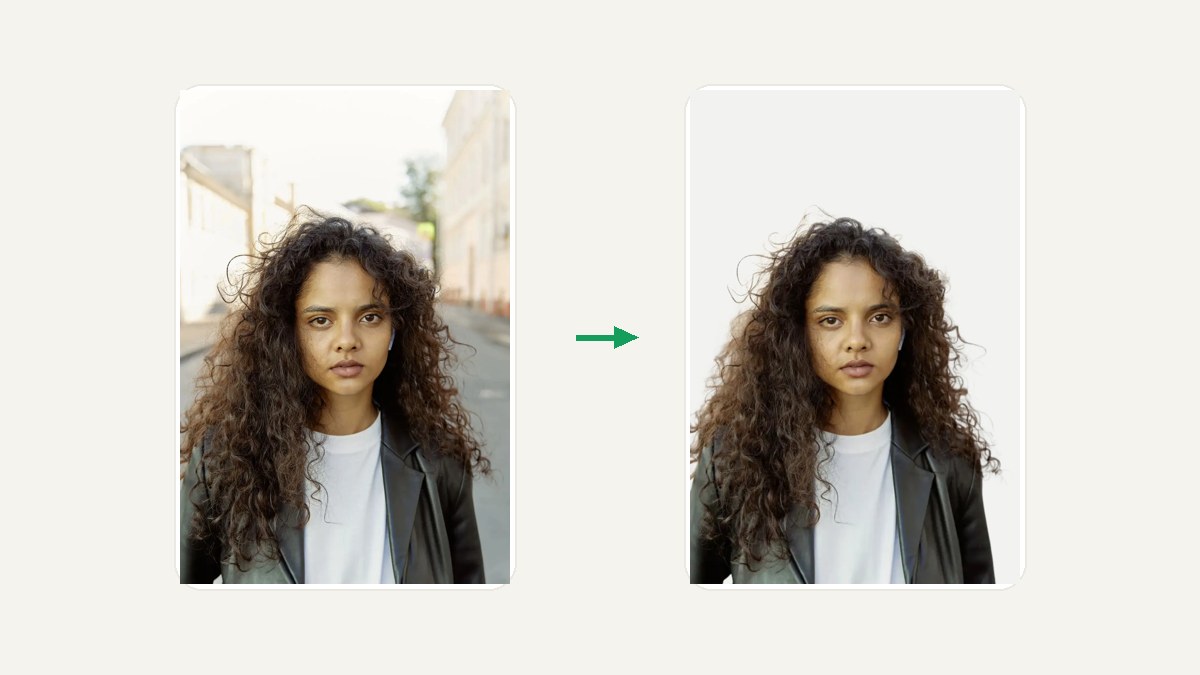
A recruiter-quality headshot used to mean booking a photographer. For most of us — a LinkedIn refresh, a resume photo, a company directory picture — that's overkill: modern phone cameras are sharp enough, and the part that actually makes a photo look "professional" is rarely the camera. It's even light on the face, a plain background, and a square crop. All three are doable at home in about a minute, and this guide is that workflow end to end: shoot it, swap the background, crop it to the size the platform wants.
Step 1: shoot it with your phone
Five minutes of setup beats any filter:
- Stand facing a window. Daylight from the front, not overhead — overhead light carves shadows under the eyes.
- Put plain space behind you. A white or light gray wall is ideal, but not required — the next step removes whatever is there.
- Hold the phone at eye level, an arm's length away. Slightly above eye level reads best; below-eye shots add double chins nobody asked for.
- Burst mode. Take ten, keep the one where your face is relaxed. Nobody nails frame one.
Skip the bathroom selfie, the car selfie, and the cropped-group-photo: all three read as low-effort to a recruiter, and cropping a group shot usually leaves a mystery hand on your shoulder.
Step 2: swap the background (about a minute)
This is the step that turns a home photo into a headshot. An online background remover cuts you out once; after that, dropping a clean solid color behind you takes seconds:
- Upload the photo to the background color changer. No account needed.
- Click a neutral swatch — white, light gray, or a soft beige. Plain beats creative for anything job-related.
- Download the result.
The cutout engine handles the hard part. Flyaway hair against a busy street is the worst realistic case, and it holds:
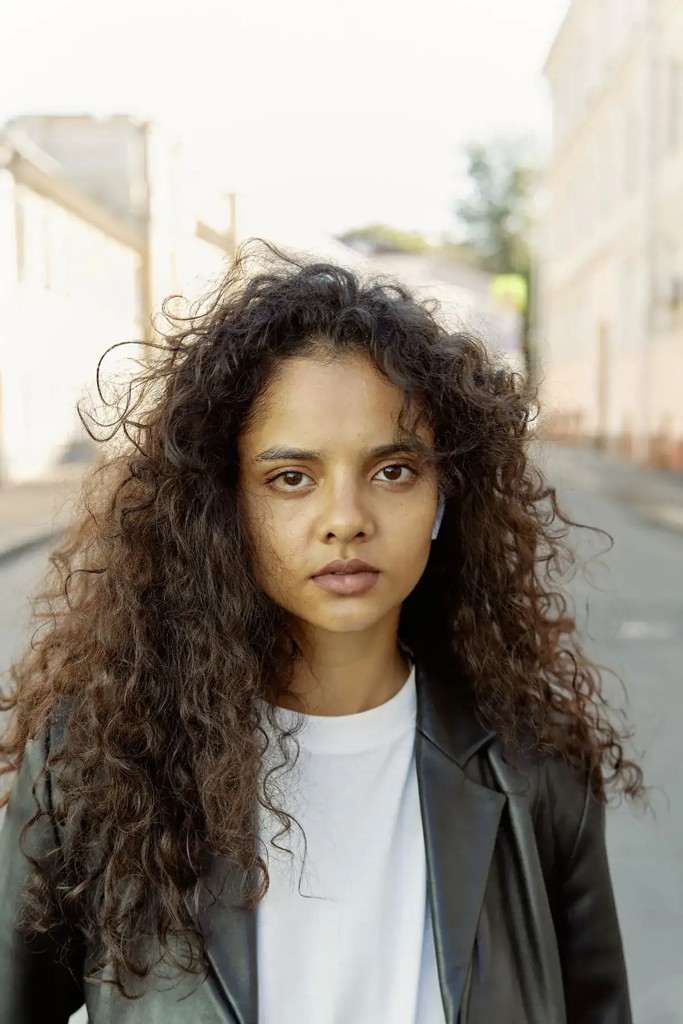
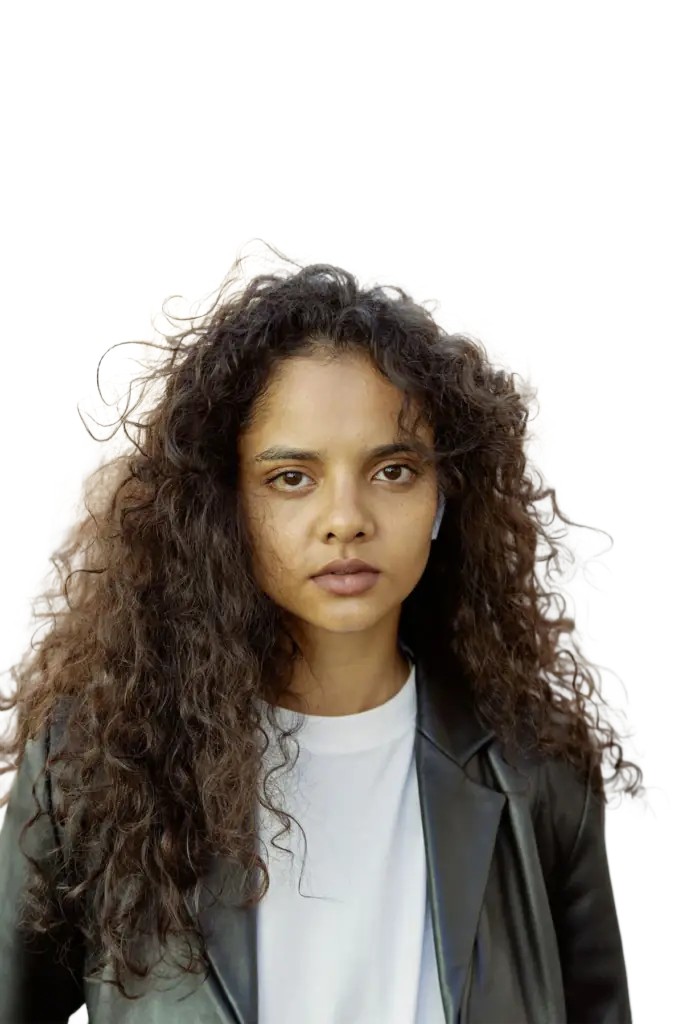
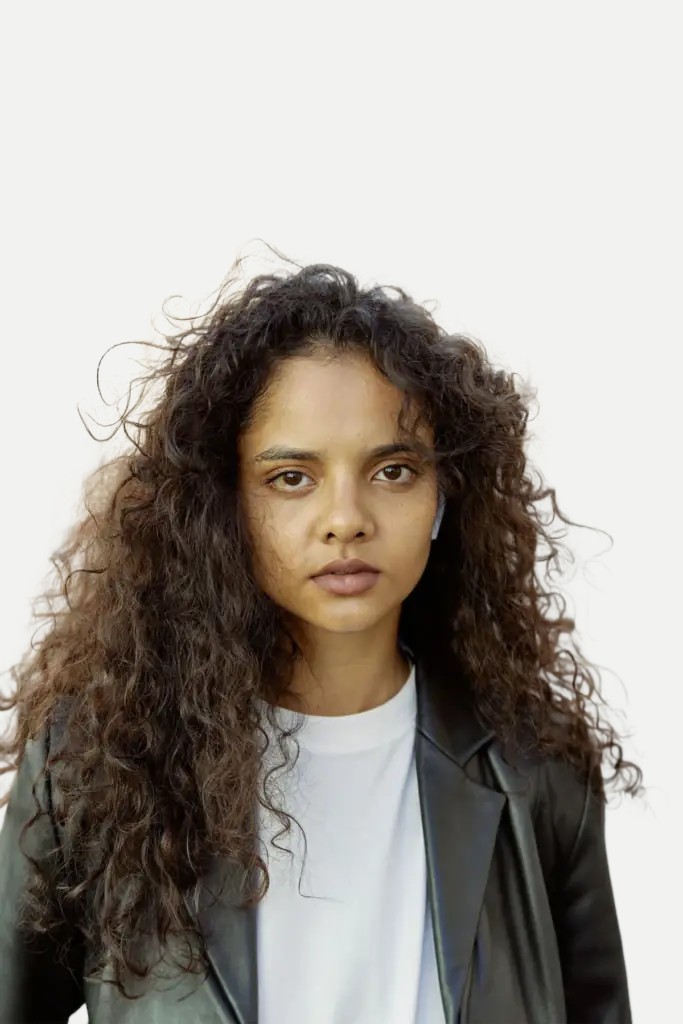
A phone photo on a busy street, the background removed, then dropped on white and on light gray — the AI keeps the flyaway strands.
Phone photos are processed in seconds; a large camera original can take up to ~20 seconds. The free tier is 2 images a day anonymously (1024px output), 5 a day with a free account — full resolution comes with any paid plan, and credits never expire, so a one-off job doesn't force a subscription.
Step 3: crop it to what the platform expects
A headshot is only "done" when it's the right shape. Common targets:
LinkedIn / X (Twitter) profile photo
- Target size
- Square, at least 400×400 px (LinkedIn minimum; displayed as a circle)
- How to get it
- Export at full resolution and upload — the platform crops the circle for you. Keep your face centered when you shoot.
Resume photo (China 简历照片): one-inch or two-inch
- Target size
- 一寸 295×413 px · 二寸 413×579 px
- How to get it
- The [ID photo tool](/passport-photo-background-remover) crops to one-inch, two-inch and more, background included.
Company directory / internal tools
- Target size
- Square, ~400×400 px or whatever HR asks for
- How to get it
- Any solid-color result from step 2 works — export and send.
LinkedIn's 400×400 minimum is the one recruiters hit most (we cross-checked the spec across LinkedIn's help center and current third-party references on 2026-09-29). When in doubt, export bigger than you need — platforms downscale cleanly, upscale poorly.
When this shortcut fails
Honest limits, so you don't waste a good photo:
- Heavy shadows on the face. No tool relights; reshoot facing the window.
- Group photos. Cutting one person out of a group almost always looks cut out. Use a solo frame.
- Hair over a same-color background. Blond hair against a beige wall confuses every edge detector. Step half a meter to the side and reshoot.
- Face fills less than ~20% of the frame. Cropping in enlarges blur with it. Get closer at shoot time instead.
What this workflow deliberately does not do: retouch skin, swap in a suit, or reshape a face. A headshot that isn't recognizably you will cost you more in the interview than a plain background ever gains — take the photo in a plain top and let it look like you.
Method 2: Photoshop (or the free twin, Photopea)
The "in Photoshop" route, for when the photo also needs real retouching:
- Select → Subject, then Select and Mask for the hair pass.
- Add a solid fill layer in your target color underneath.
- Decontaminate colors on the edge — removes the old background's fringe. Most skipped step, biggest difference.
- Crop, export JPG.
Photopea runs the same steps free in a browser. For one photo and one plain background, the online tool above is faster; reach for Photoshop when the face needs dodging and burning too.
Frequently asked
Is a home headshot really good enough for LinkedIn? Yes — provided the light is even and the background is clean. Recruiters react to clarity and framing, not to the absence of a studio. The profile photo is displayed small and circular; edge quality and a centered face carry it.
Does it cost anything? The free tier runs the whole workflow: 2 images a day anonymously, 5 a day with a free account, 1024px output. Paid plans add full resolution and a commercial license that attaches to each paid result permanently.
Can I use it for a resume or CV photo? Yes. For China-format 简历照片, use the ID photo tool's one-inch (295×413) or two-inch (413×579) preset after the background swap. Note that a few employers (and some countries' official documents) have their own photo rules — check before you submit.
My hair never survives cutouts — why is this different? Edge quality is the whole game in background removal, and it's also where cheap tools fail. Our background removal quality guide shows exactly what to inspect — flyaway strands, semi-transparent gaps, edge fringe — before you trust any tool with a photo that represents you.