How to Remove Background in PowerPoint (Free)
PowerPoint removes a picture background one at a time, and hair needs manual fixes. The exact click path, its real limits, and a free online route.
 BackGone Team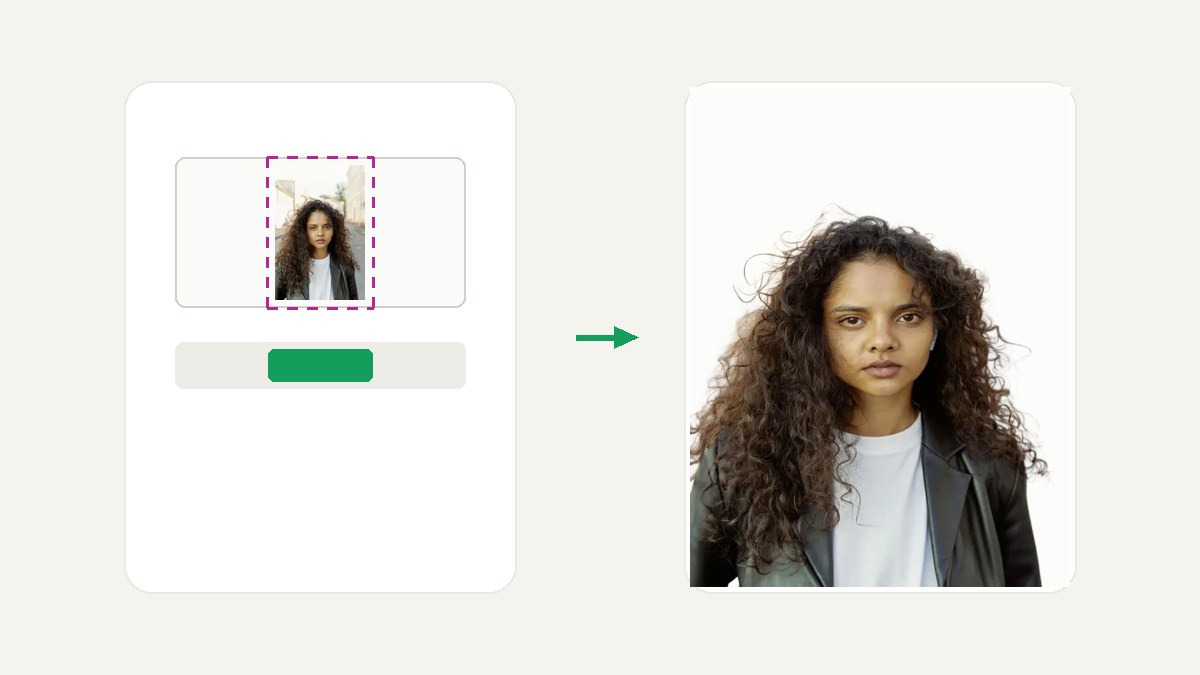
"Remove background in PowerPoint" is two different jobs wearing one search. Job one: a picture on this slide looks messy and you want it clean before the meeting — PowerPoint's built-in tool is genuinely built for that. Job two: you need the picture itself as a reusable cutout, for a marketplace listing, a resume, a thumbnail — and for that, PowerPoint is the wrong shape of tool. This guide does both honestly: the exact click path for the built-in feature, where it actually breaks, and a free online route for the cases it can't carry.
Method 1: the built-in Remove Background
The feature is one click deep, but the auto guess is rarely the whole job:
- Insert → Pictures, choose your image, and click it.
- Open the Picture Format tab (it appears only while a picture is selected) and click Remove Background, far left of the ribbon.
- PowerPoint guesses: everything shown in magenta will be removed. On simple subjects it's close; on details it's usually wrong.
- Use Mark Areas to Keep and Mark Areas to Remove, drawing lines across the misjudged regions. Zoom to ~200% for edges; each stroke recalculates the mask.
- Click Keep Changes.
What you have now is a presentation-grade cutout: a threshold-style segmentation plus your manual marks, tuned to look acceptable projected on a slide. That is a real, useful thing — as long as you know its edges:
- One picture at a time. There is no batch. Forty product photos means forty rounds of marking — that job belongs to the bulk background remover.
- The cutout lives in the deck. It only exists inside the .pptx. To reuse the image elsewhere, right-click the picture → Save as Picture → PNG (PNG keeps the transparency). Most people meet this step for the first time when they urgently need it.
- Complex edges are manual work. Flyaway hair, fur, veils, glass — the auto pass keeps the body and loses the strands, and you paint keep-marks strand by strand. The refinement buttons exist because the auto pass needs them; current tutorials for the built-in tool spend most of their length on exactly this.
- Desktop only in practice. The full tool — including the refinement marks — is a desktop PowerPoint feature; the browser version either lacks the refinement tools or reserves them for paid plans (24Slides and slidely.ai tutorials, checked 2026-09-29). And despite what some roundups imply, it is not a Microsoft 365 exclusive: desktop PowerPoint has shipped Remove Background since 2010, and one-time-purchase Office 2019/2021 include it (Microsoft's support article and the Office 2019 documentation agree; we verified on 2026-09-29).
- No background replacement. You get transparency on the slide; to put the subject on a new color you draw a shape behind it yourself.
The hard case, side by side
The worst realistic photo we test our engine with is a street portrait: flyaway hair against a busy background. Here is that exact photo run through our production engine — real output, not a mockup:


One difficult photo through our production engine: the strands at the outline survive, and the street between them does not.
This is the class of image where the built-in tool's public reputation lands: fine for the body of the subject, strand-by-strand manual marking for the hair. Our engine handles it in seconds — we measured single runs at roughly 17s for a 6MP photo, 13s for 12MP, 18s for 24MP, and 33s for a 50MP original (the full numbers live in our background removal quality guide, along with the six-point edge checklist we use before trusting any cutout).
Method 2: the online route
When the picture must survive close-up scrutiny, cut it out before it ever enters the deck:
- Upload it to the online background remover. No account needed.
- Download the PNG — full edge quality, transparent background.
- Insert the PNG into your slide. It sits cleanly on any background you draw behind it.
The free tier runs 2 images a day anonymously (1024px output), 5 a day with a free account, and any paid plan unlocks full resolution — credits never expire, so a one-off deck doesn't force a subscription.
Pick the route by scene
Racing a presentation, need a clean picture now
- Why this one
- Upload, download the PNG, drop it on the slide — edges hold up when the slide is projected.
A batch of product photos for a listing
- Why this one
- Whole folder at once with consistent output, instead of marking pictures one by one.
ID-photo grade requirements
- Go to
- ID photo tool
- Why this one
- Official sizes and background colors per country — a deck tool has no notion of any of this.
When PowerPoint is the right tool — and when it isn't
Use the built-in when: the picture already lives in the deck, it's one or two pictures, the quality bar is "looks fine projected," and you don't need the image anywhere else. In that lane it is fast and free with zero context switching.
Don't use it when the picture is an e-commerce main image (marketplaces and buyers judge edges at 100%), a resume or ID photo (hair edges plus official background rules), a hair-heavy portrait, anything you need to reuse outside the deck, or more than a handful of pictures. Those are the jobs the online route above exists for.
Frequently asked
Does Remove Background require a Microsoft 365 subscription? No — not for the desktop feature. Desktop PowerPoint has included it since 2010, and one-time-purchase Office 2019/2021 have it too; we verified this against Microsoft's support article and current Office 2019 documentation on 2026-09-29. What the subscription actually gates is the browser version: PowerPoint for the web omits the refinement tools (or reserves them for paid plans).
Can PowerPoint handle hair? The body of a subject, usually yes. Flyaway strands, no — expect to paint Mark Areas to Keep over the outline, strand by strand. For a hair-heavy portrait, cut it out online first and insert the finished PNG; the difference is exactly what the side-by-side above shows.
How do I export the cutout from PowerPoint? Right-click the edited picture → Save as Picture → choose PNG. PNG preserves the transparency; JPEG silently fills the removed area with white.
Is the online alternative really free? The free tier covers the occasional deck: 2 images a day anonymously, 5 a day with a free account, at 1024px. Paid plans add full resolution, and a commercial license attaches to each paid result permanently.